Overview:
In this tutorial, I would like to demo Spring WebFlux Security – security for reactive web applications.
Sample Application:
Lets consider a simple application which has 3 API endpoints. We need to have the security as shown below.
Project Setup:
Create a Spring Boot project with these dependencies.

Spring WebFlux Security – API Controller:
I create a REST controller with below endpoints.
@RestController
@RequestMapping("home")
public class AuthController {

    @GetMapping("user")
    public Mono<String> userHome(){
        return Mono.just("user home");
    }

    @GetMapping("admin")
    public Mono<String> adminHome(){
        return Mono.just("admin home");
    }

    @GetMapping("any")
    public Mono<String> any(){
        return Mono.just("authenticated home");
    }

}
Spring WebFlux Security Configuration:
- Create a configuration class to configure path with allowed roles/authorities as shown below.
- Any other path (for ex: /home/any ) will be allowed for anyone in the application as long as they are authenticated.
@EnableWebFluxSecurity
public class WebSecurityConfig {

    @Bean
    public PasswordEncoder passwordEncoder(){
        return new BCryptPasswordEncoder();
    }

    @Bean
    public SecurityWebFilterChain springSecurityFilterChain(ServerHttpSecurity http) {
        http.authorizeExchange()
                .pathMatchers("/home/user").hasAnyRole("USER", "ADMIN")
                .pathMatchers("/home/admin").hasRole("ADMIN")
                .anyExchange()
                .authenticated()
                .and()
                .formLogin();
        return http.build();
    }

}
User Database:
I need a user database. I am using this map for this demo purpose.
- We need to build the UserDetails object with user username, password and user specific roles
@Configuration
public class UserDB {

    @Autowired
    private PasswordEncoder passwordEncoder;

    @Bean
    public Map<String, UserDetails> map(){
        return Map.of(
                "user", User.withUsername("user").password(passwordEncoder.encode("user")).roles("USER").build(),
                "admin", User.withUsername("admin").password(passwordEncoder.encode("admin")).roles("ADMIN").build(),
                "any", User.withUsername("any").password(passwordEncoder.encode("any")).authorities(Collections.emptyList()).build()
        );
    }

}
Reactive User Details Service:
This is the last important piece! We need to provide an implementation of ReactiveUserDetailsService. It needs to return user details based on the username.
@Service
public class UserDetailsServiceImpl implements ReactiveUserDetailsService {

    @Autowired
    private Map<String, UserDetails> map;

    @Override
    public Mono<UserDetails> findByUsername(String username) {
       return Mono.just(this.map.get(username));
    }

}
Spring WebFlux Security – Demo:
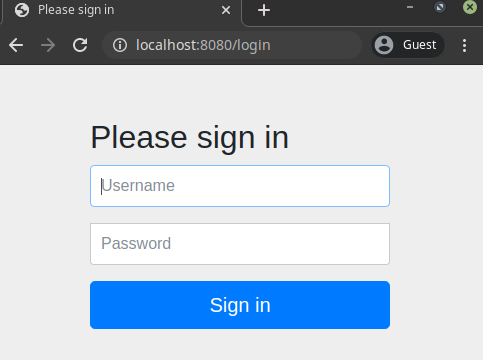
Start the application. Try to access any of the above configured endpoint. The application will automatically redirect you to the login page.

If we login as admin and try to access admin page, we get the appropriate response.

If we use the ‘any’ authenticated who does not have sufficient role, we get the below response.

@EnableReactiveMethodSecurity
If you do not like to configure the path matchers and roles, we can keep the security as simple as shown below.
@EnableWebFluxSecurity
@EnableReactiveMethodSecurity
public class WebSecurityConfig {

    @Bean
    public PasswordEncoder passwordEncoder(){
        return new BCryptPasswordEncoder();
    }

    @Bean
    public SecurityWebFilterChain springSecurityFilterChain(ServerHttpSecurity http) {
        http.authorizeExchange()
                .anyExchange()
                .authenticated()
                .and()
                .formLogin();
        return http.build();
    }

}
We could add the PreAuthorize/PostAuthorize annotations on the method to provide the similar behavior.
@GetMapping("user")
@PreAuthorize("hasRole('USER')")
public Mono<String> userHome(){
    return Mono.just("user home");
}

@GetMapping("admin")
@PreAuthorize("hasRole('ADMIN')")
public Mono<String> adminHome(){
    return Mono.just("admin home");
}
Summary:
We were able to successfully demonstrate the Spring WebFlux Security for our reactive web application.
Learn more about Spring WebFlux.
- Spring WebFlux WebSocket
- Server Sent Events With Spring WebFlux
- Spring WebFlux – Reactive WebClient Introduction
The source code is available here.
Happy learning 🙂

