Overview:
In this tutorial, I would like to show you Spring WebFlux WebSocket to enable a real-time communication between a client and the server.
Spring WebFlux WebSocket:
Spring WebFlux is a non-blocking web stack to handle multiple concurrent requests with minimal number of threads and scale with fewer hardware resources. WebSocket is a standardized way to enable a fully duplex / 2-way communication channel between a client and a server over a single TCP connection.
Sample Application:
I am going to keep things very simple in this article in a way that a client would be sending a message to the server via WebSocket connection. The server would receive the string message and just uppercase it and respond to the client. Nothing else.

Project Setup:
Create a Spring Boot project with below dependencies. (There will be a separate dependency for WebSocket. DO NOT INCLUDE that.)

Spring WebFlux WebSocket – Server Side:
We need to have an implementation for WebSocketSessionHandler and map the handler with specific URI. This WebSocket session handler is responsible for sending / receiving the messages to and from client.
- We could access the inbound messages from the receive method as Flux<WebSocketMessage>.
- We could process the message and send the response via send method
In the below case, we simply upper case the message.
@Service
public class WebFluxWebSocketHandler implements WebSocketHandler {

    @Override
    public Mono<Void> handle(WebSocketSession webSocketSession) {
        Flux<WebSocketMessage> stringFlux = webSocketSession.receive()
                .map(WebSocketMessage::getPayloadAsText)
                .map(String::toUpperCase)
                .map(webSocketSession::textMessage);
        return webSocketSession.send(stringFlux);
    }

}
We need to add this message handler to a specific path.
- /uppercase is the URL where the client should connect
@Configuration
public class WebFluxConfig {

    @Autowired
    private WebFluxWebSocketHandler handler;

    @Bean
    public HandlerMapping handlerMapping(){
        Map<String, WebFluxWebSocketHandler> handlerMap = Map.of(
                "/uppercase", handler
        );
        return new SimpleUrlHandlerMapping(handlerMap, 1);
    }

}
Our server is ready to serve the clients now. Start the application.
Spring WebFlux WebSocket – Client Side:
We need a client to test WebSocket. There is an interesting chrome extension which you can get it from here.

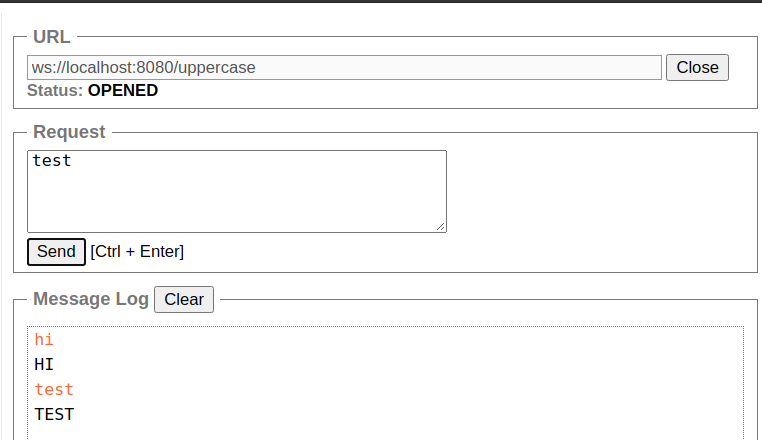
Connect the client to the WebSocket server. In the request text area, type some message and click send. If you see in the below screenshot, I have got some responses in the upper case.

Spring WebFlux WebSocket – JUnit Test:
Create a WebSocket client as shown below. We send a message to the server periodically using Flux.interval.
WebSocketClient client = new ReactorNettyWebSocketClient();
URI uri = URI.create("ws://localhost:8080/uppercase");

Flux<Long> longFlux = Flux.interval(Duration.ofSeconds(1));
client.execute(uri, webSocketSession ->
    // send msg
    webSocketSession.send(
            longFlux.map(i -> webSocketSession.textMessage("vinsguru" + i))
    ).and(
            // receive message
            webSocketSession.receive()
                    .map(WebSocketMessage::getPayloadAsText)
                    .doOnNext(System.out::println)
    ).then()
).block(Duration.ofSeconds(5));
Output:
VINSGURU0
VINSGURU1
VINSGURU2
VINSGURU3
Summary:
We were able to successfully demonstrate the Spring WebFlux WebSocket for a real time communication between a client and a server.
Read more about Real Time Communication / Stream processing.
- RSocket + WebSocket + Spring Boot = Real Time Application
- Kafka Stream With Spring Boot
- Server Sent Events With Spring WebFlux
The source code is available here.
Reference: Spring Doc


Hi Vins,
thank you for post, could you please show how to implement an authentication with Spring Webflux Websockets?
Hi,
Can you please shed some light on STOMP + Webflux. I could not get any examples anywhere on the internet.
Thanks